
I wanted to learn and create a web development container to play around in that will save me from installing all these tools locally on my day to day laptop. I have been messing around with Podman and I really like it. If you want to set this up as simple as possible this will get you started if you are new and would like to see how it goes in steps. I will start off using the terminal but will also use the Podman Desktop tool to see everything visually.
What is Podman?
As per their site: Podman is a daemonless, open source, Linux native tool designed to make it easy to find, run, build, share and deploy applications using Open Containers Initiative (OCI) Containers and Container Images.
If you haven’t done so install Podman for your distro. In my case I do:
sudo apt install podman
Install the Podman Desktop tool. It’s free.
Running the Podman Commands
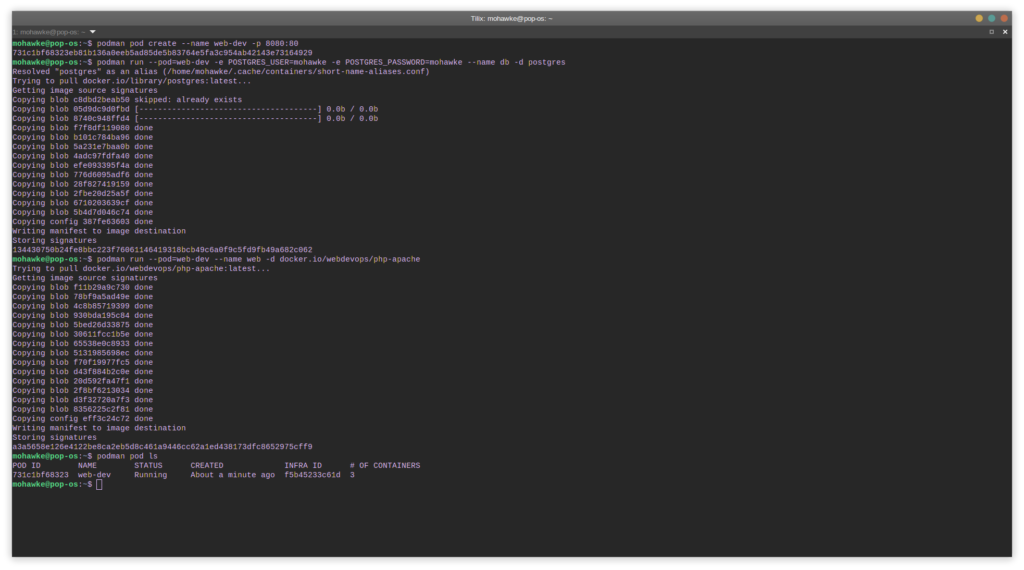
First is to create the pod to hold our containers. We want to expose PORT 8080:80 to access locally and we give it the name web-dev. We will add an Apache/PHP and PostgreSQL container to the pod web-dev. Open the terminal and type:
podman pod create –name web-dev -p 8080:80
Next create the PostgreSQL container adding to the pod naming it db:
podman run –pod=web-dev -e POSTGRES_USER=devuser -e POSTGRES_PASSWORD=devuser –name db -d postgres
and finally lets add Apache with PHP naming it web:
podman run –pod=web-dev –name web -d docker.io/webdevops/php-apache
The run command grabs the images from docker.io. We can verify that the pod and containers were created and are running with:
podman pod ls
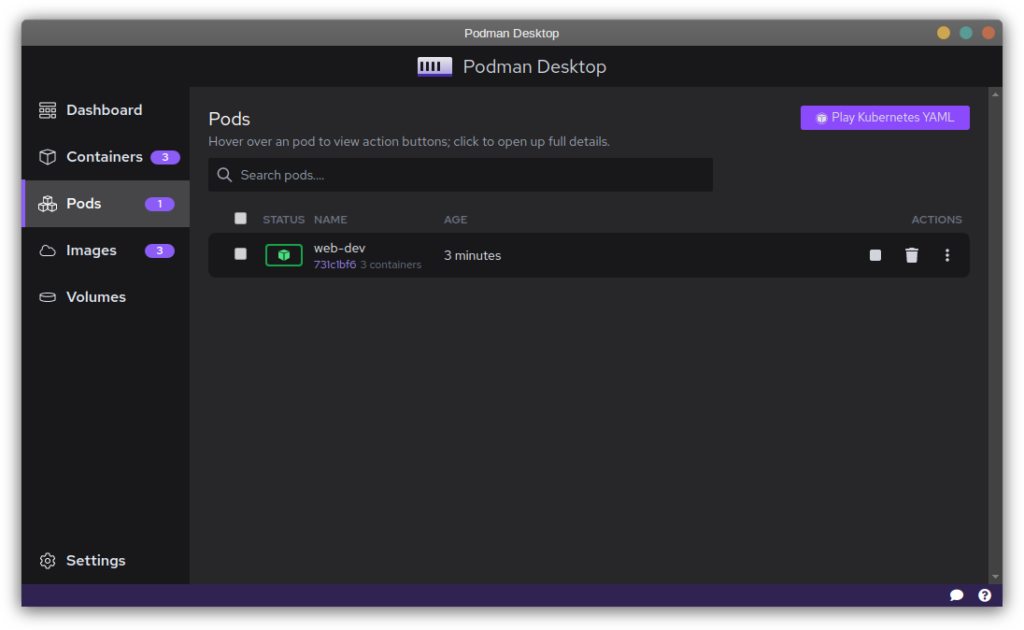
If your status says running and you have 3 containers, you are good. You can go to a web browser and visit http://localhost:8080 to see if it’s up, if you like. Let’s take a look at what was created in the Podman Desktop tool. First image shows the pod, the second shows the containers.

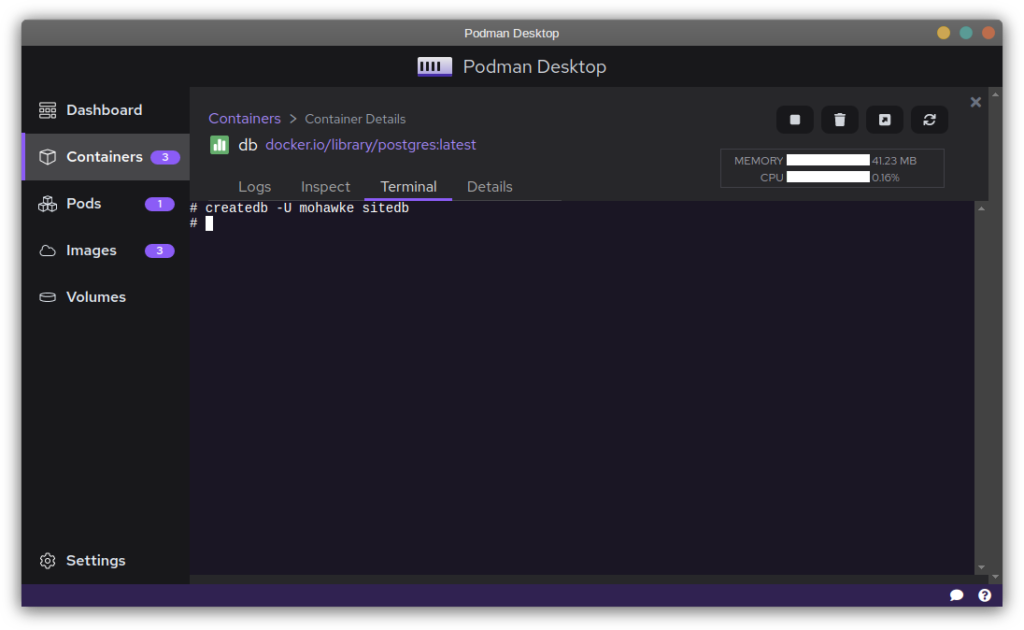
Access a Container Terminal and Create a Database on Container DB
While in Containers hover over db and click the three dots on the right. Open the terminal so we can create the database. We just use the user you created when you made the container, which is done with -U arg… I used mohawke for me and devuser in this tutorial. Adjust accordingly if you want it to be something else. To create the database type:
createdb -U devuser sitedb
Accessing the File System in VS Code to Create a Test Page
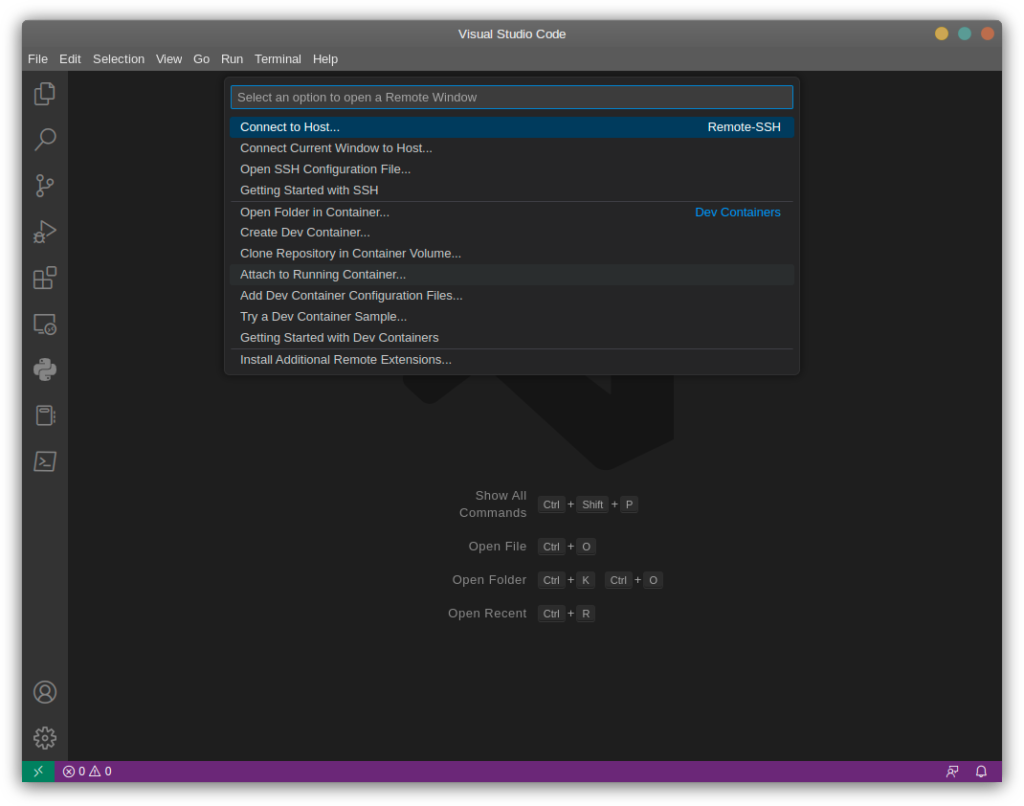
We got everything running so now it’s time to create a web page to verify PHP and the database is actually working as expected. We will use VS Code and the Remote Development extension to add some code. Install VS Code then in VS Code install the extension, if you do not have them already.
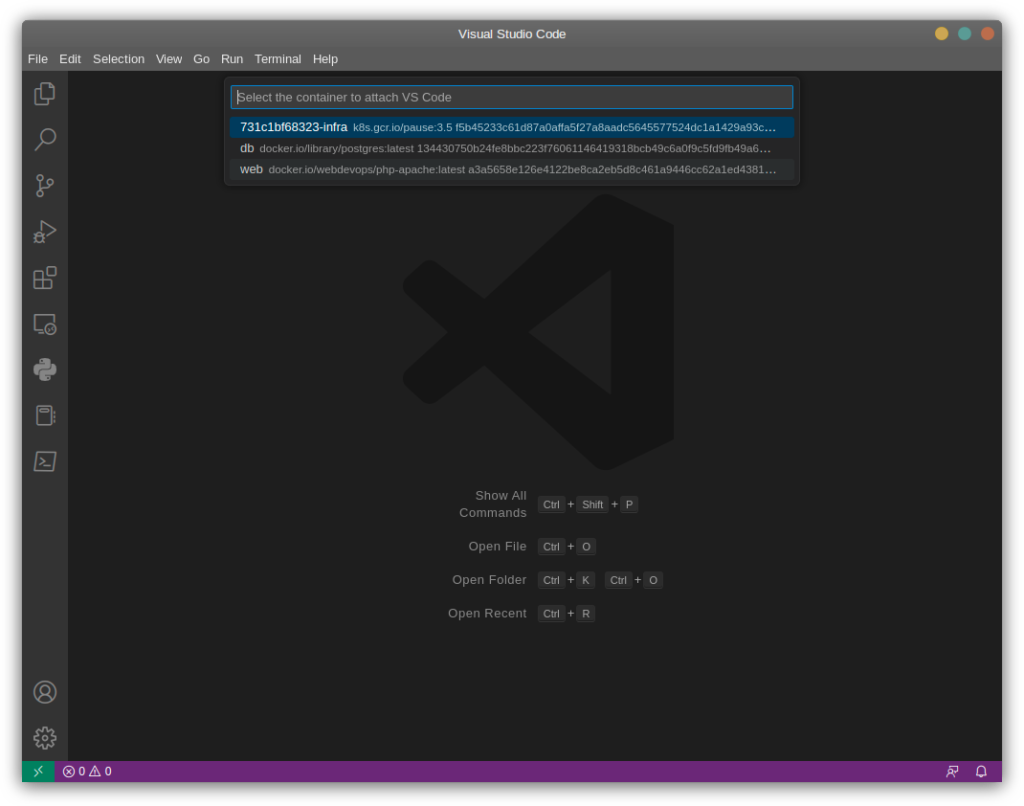
Once the Remote Development extension is installed you will see a green box on the bottom left of the IDE. Click that to reveal a drop down at the top center. There you select Attach to a Running Container. This will open a new window.
You should now see db and web in the drop down. Select web.
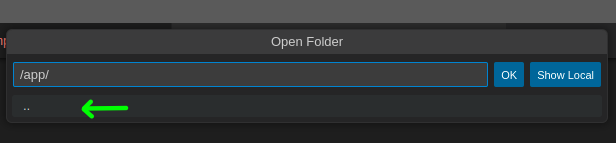
You will now see //root/ prepend app, //root/app/ and hit enter and click the two dots and nav to app.
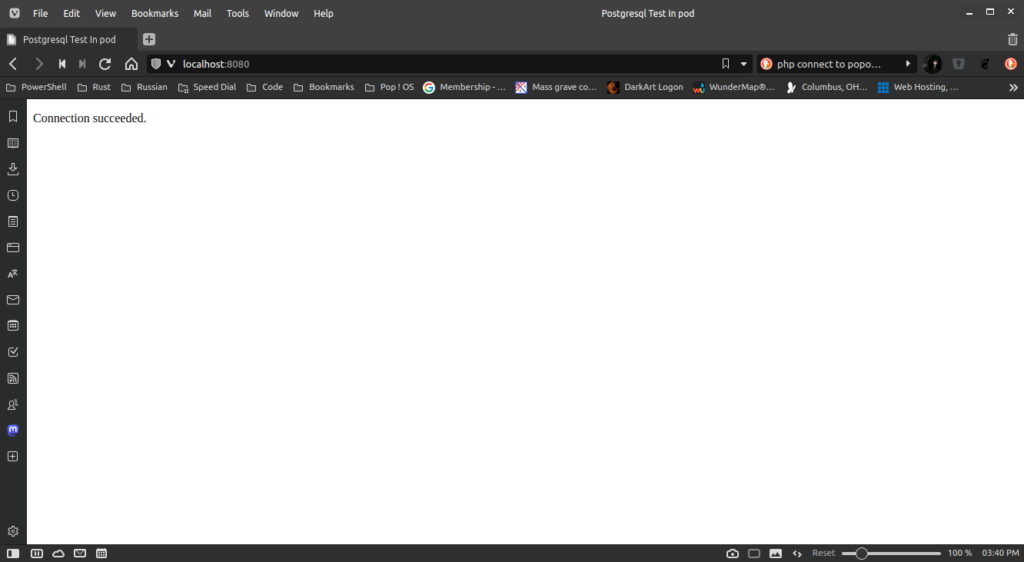
Add the following contents to the file, save, and visit http://localhost:8080
!DOCTYPE html PUBLIC "-//W3C//DTD HTML 4.01//EN">
<html>
  <head>
    <title>Postgresql Test In pod</title>
  </head>

  <body>
    <?php
      // Postgres connection
      $conn = pg_connect("host=localhost dbname=sitedb user=devuser");
      if (!$conn) {
        die("Error in connection: " . pg_last_error());
      } else {
        echo "<p>Connection succeeded.</p>";
      }
      pg_close($conn);
    ?>
  </body>
</html>
If all went well you will see a connection success in the browser. That’s it.
If you have a folder full of php content you can copy that up to the container. This is just a beginning but if you want to see a Dockerfile that pushes data to the container see my other post on containerizing Calibre.
Peace!
 Tech. junkie, artist, coder, and supporter of open source.
